Monday, February 28, 2011

Of hand sewing and quilting

In the past I have posted about my frustration and dislike of hand sewing.


And for the exception that proves the rule I have done a lot (for me) of it in the last week and am planning a lot more this week. And I have been enjoying it!
The petals on the Doll Quilt are almost all sewn down, and the hand quilting is up next. I had a great time chooseing the thread colours on the weekend.
I also need to sew down the binding on this quilt. I pieced the top in April last year, basted it in September and quilted it a month or so ago. It has been a great couch quilt while it has waitied to have the binding sewn.
I think I have (finally) chosen the final border for the BSPDU quilt so as soon as this is on that will be basted and hand quilted. I got some more perle cotton coulours on the weekend for that purpose as well.
Embroiding the labels for the back is also on the list.
I can see a more social sewing week in my house. Not so much time shut away at the machine and more in the living areas of the house.

Saturday, February 26, 2011

Quilting along with Blocks 8 , 9 & 10

The next three blocks up for the Quilt Bloggers Block-a-Palooza hosted by Quilt Dad, John - now I finally have the pictures taken.

Bock 8 Basket of Geese by Angela from Angela Yosten: Moda, Home, Mom featured some applique. Not a worry (remember the Doll Quilt Petals - they are coming along by the way). I was going to needle turn mine (with the recommended fusible web for stability (fiddly with such small pieces). Why would I bother? I wash my quilts in the machine and I just don't like having raw edges on something that gets that punished. In the end though the triangle wouldn't sit flat with such small pieces so I machine blanket stitched them. Hopefully they hold up OK.

Block 9 Lemonade Stand by Scott from Blue Nickel Studios was more Flying Geese.
Did you know before I started this quilt along I had never made a Flying Geese unit? Course not, why would you? Well, when it came to triangles I was all half-square. But I might be adding a new unit to my repertoire. I think I like the version of construction in this block the best. Yes it is easier to join the squares to a rectangle and trim but there is waste, in that method and I don't like waste. And yes it is a little harder to have this unit end up square and the points to be all in a line but I'm usually up for a challenge.
The latest, from Thursday, was designed by Amy from Amy's Creative side. I like this block, I can imagine this being a whole quilt with the blocks turned different ways.

I wonder what is in store for us on Monday (or most likely Tuesday morning here in Australia)?

Tuesday, February 22, 2011

From Scraps... to blocks... to a quilt top.

Back in late October I sent out bundles of some fabric and some grey squares for my month, November, in the Bee Seam Piecing Downunder Bee with the inspiration word 'circles'.

I deliberately didn't provide a particular pattern because I wanted all the bee members to tackle the project with some opportunity to implement their own creativity and to tackle curves seams that make so many people nervous in the way they felt most comfortable. I'm not completely mean so I did provide links to some tutorials and some inspiration blocks.

Soon they started to arrive back, and now Christmas has passed and the summer holidays are a distant memory I thought it was about time they were sewn together in a quilt top and then a quilt.

There are 12 members of the bee but unfortunately 2 blocks were lost in the mail and 2 more have never turned up so I now have 20 blocks instead of the 24 I planned for. No number of calls to the Australia Post Dead Letter Office (like the Bermeuda Triangle of mail apparently) is having much luck with the missing blocks.
In order to make up the difference in quilt size with the limited number of scraps with the coordinating fabric I have I have decided to make scrappy sashing with 2" finished squares between the blocks.
So this week I have been cutting and sewing and cutting and sewing these strips together in sets if five to form the sashing between the blocks with grey posts. I am thinking at this stage that I will also do a grey border and a scrappy binding, I think I have enough of the coloured fabric for that.

Any suggestions for the border fabric? I have this at the moment and would like to add 6" borders I think. At the moment the quilt top measures 50"x60".  

Sunday, February 20, 2011

A Doll Quilt Weekend....

I spent most of the sewing time on the weekend working on my quilt for the Doll Quilt Swap on Flickr.

I pieced the melons or petals....

Made the decision to applique them to the background rather than piece them on and laid them out on the background....

And started the hand sewing.


I might do some on that in front of the TV this week. I made good progress on the Blue and White Quilt this week but need a little break now all the centre blacks are quilted into place. Then again I might do something about turning my BSPDU blocks into a quilt top.

Saturday, February 19, 2011

Scrappy Mug Rug Swap - Sent and Recieved

The Scrappy Mug Rug Swap round one was a smallish affair but obviously struck a cord with a whole bunch of people because the flickr group is now huge. And I can completely understand it because the finished mug rugs are
1. cute
2. useful
3. can be finished in a night or an afternoon.

A satisfaction guarnteed, reasonbly quick project.

The current round of the swap, the third, was my second. I made the tops of these two mug rugs and couldn't decide which to send so I made both (rather than a top and a bottom because they had come out different sizes) and sent both with a little extra surprise.

Sent:


and on the very day I posted mine off to it's new owner and home I came home to find this one waiting for me in the letterbox.

Recieved:
From LethargicLass

Thanks to Lethargic Lass, for this one!

Thursday, February 17, 2011

Quilting Along

I've never participated in a quilt along before. And now I seem to be adding a lot to the list.

Most, like the Postage Stamp quilt along with P.S. I Quilt and The Single Girl Quilt along with Nova, Megan and Katy I have put on a list of projects to be done sometime within the next year - more like quilting along behind really.

I am, however, completing the Bloggers Block-a-Palooza quilt as part of the 'pack'. There has been a few hiccups with the fabric requirements being shared but I have decided to use the Sunkissed fabric by Sweetwater which is the featured fabric being used.

I decided this on for a couple of reasons with the major one being that the final design of the quilt is a surprise and not having this overview of the finished quilt yet would make fabric decisions for blocks exceptionally difficult.

 So I have been happily stitching along and these blocks are what I have made so far.

I think I like this one the best at the moment!

Tuesday, February 15, 2011

Brown Bag Quilt Contest - A fabric challenge

Have you seen Stash Manicure? As is the way with most of the blogs I read I can't remember exactly how I stumbles across it but I started reading more regularly when I was trying to make some order of my storage system.

In the process I came across some fabric that I could no longer imagine myself using - but couldn't throw out. And about then the Brown Bag Challenge was announced on Stash Manicure.

The idea was that you signed up, sent 2 yards (2.5 yards, I can't remember, it was awhile ago now) of no longer wanted fabric for someone else to turn into a quilt. They could add as much of their own fabric as they wanted but had to use at least 90% of what was sent to them.

This arrived from Becky in my letterbox just after we moved. Not at all my usual style. This quilt was going to take a little thought.


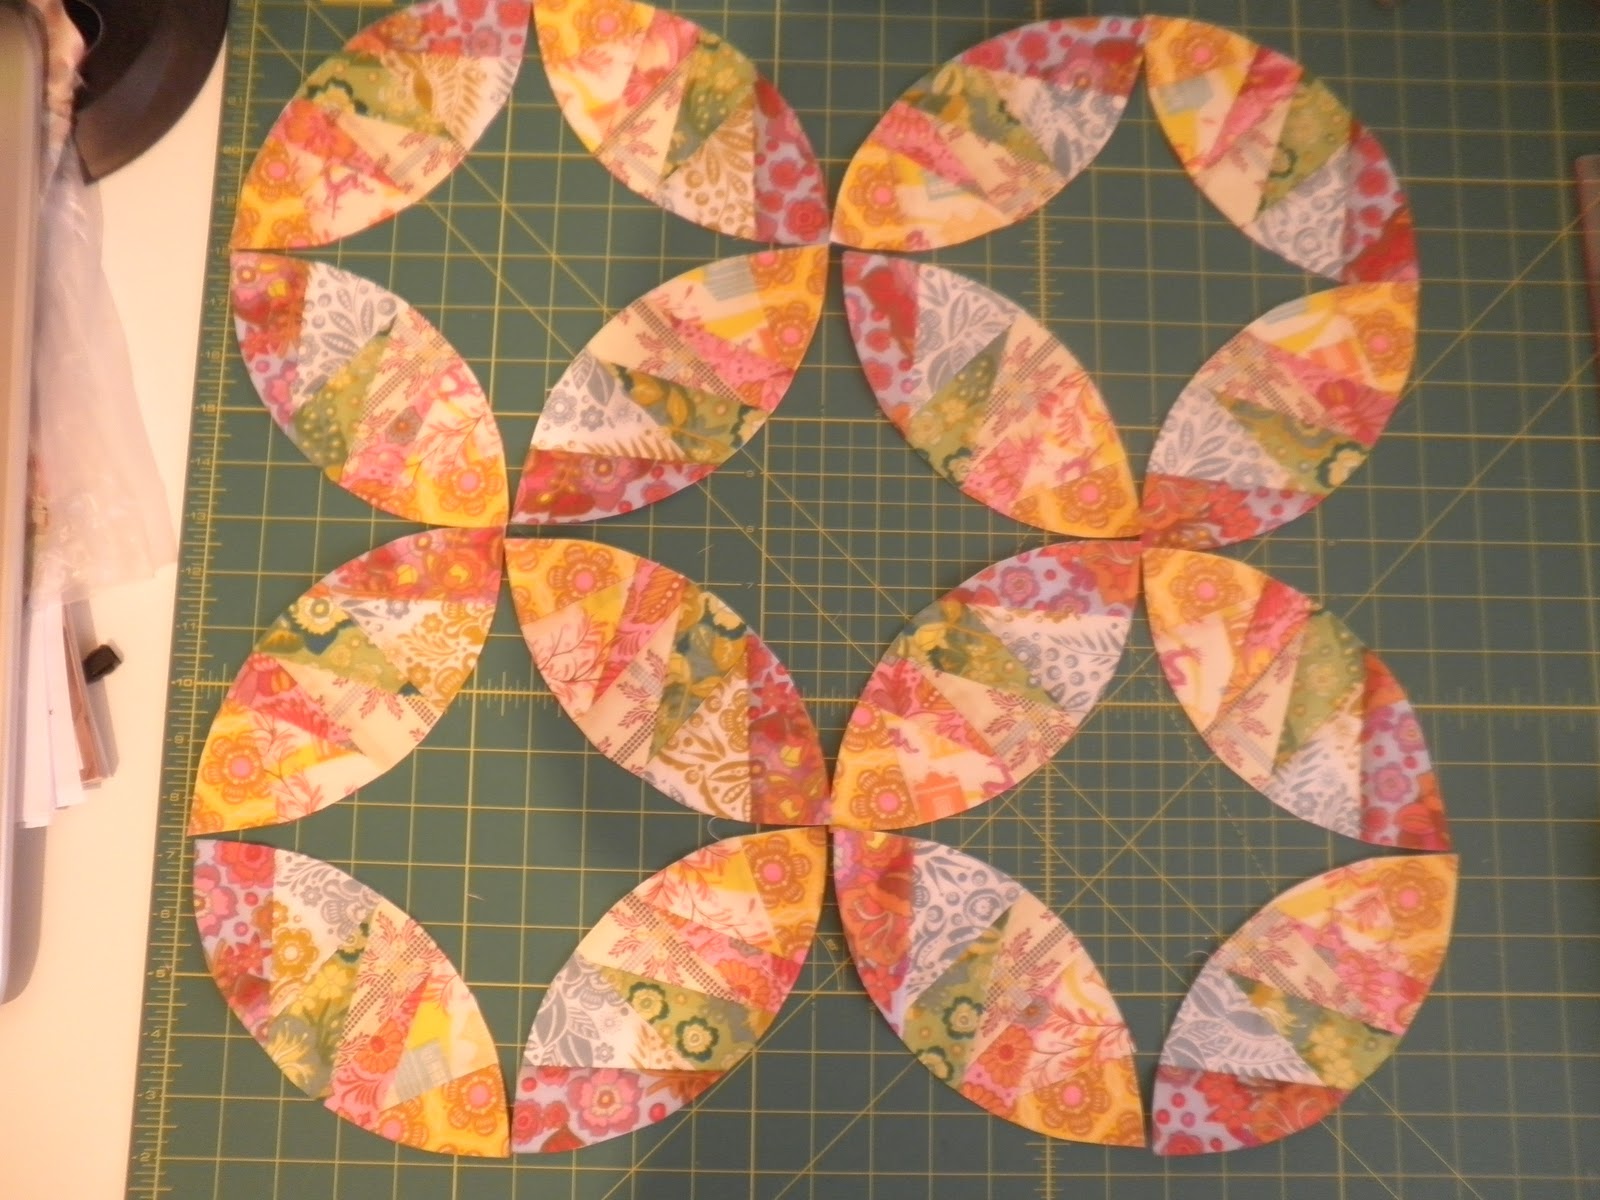
The fabric was mostly strips at about 5" wide so I made the decision to go with a modernish design, a bento box. I constructed it by first making the Courthouse blocks and then cutting in quarters and reassembling. The centre sqaures were all cut in 5" squares and the outer rounds at 2.5".


The fabric was split into 'light' and 'dark' value piles and but eventually it became the blue flowers and everything else because of the quantities in the package.

I cut the sqaures and borders as I went, making pairs of blocks together. I had not planned out my fabric use so I really had no idea how many blocks I was going to be able to make or how big the quilt was going to end up. I stopped only when I couldn't cut an outer border long enough any more.

It reminded me the whole time I was sewing it of a book I used to read at my grandmother's house when I was younger, Something Absolutely Enormous. The little girl in the book starts knitting and make a whole bunch of things before knitting something huge that takes over her whole town....then she starts baking.

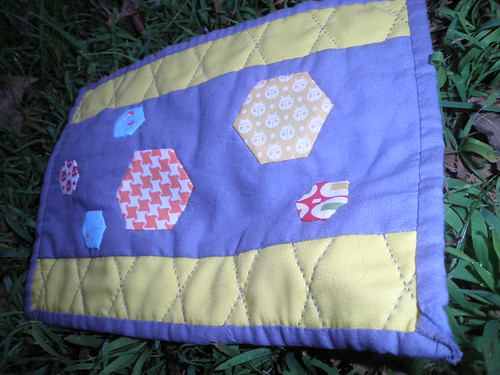
The fabric left over at the end of the block making was sewn together to make a pieced stripe in the back and to add a little length to the binding that was taken from my stash. 

In the end I only had the trimmings. The backing fabric was purchased as I didn't have anything that would co-ordinate but the batting was two or three off-cuts sewn together from the batting scrap box.
I outline quilted the Bento Boxes into quarters,

and I think it looks good on the back as well.

It has ended up about 48" square.

Why don't you check out the Flickr group to see what others have come up with from their Brown Bags?

Sunday, February 13, 2011

Weekends- gotta love them!

Are good times for sewing - no work to get in the way!

Friday night:
Catching up on last weeks blocks for the Bloggers Block a Palooza Quilt Along.

Saturday:
Finishing up on the mug rugs for the Scrappy Mug Rug Swap.

I packaged up a whole bunch of things for the post office too - that will be a big trip tomorrow.

Sunday:
A prototype for the Doll Quilt Swap - and I think I have decided on the fabric. Not this, I'm keeping it under wraps for a bit until I have decided for sure.

There are some details to iron out with the construction but I think I have the plan now. A task for the next weekend.

This week I'm hoping to get a little further on the Blue and White quilt that has been a bit stagnant for awhile!

Wednesday, February 9, 2011

It's a plane, it's a Quilt Block - No it is both

Maybe it is because I like to get real mail in the letterbox or maybe because it forces me to try things that I wouldn't ordinarily have a go at I keep joining bees and swaps. I expect it is a little of both.


I do this even right after I have decided that enough is enough and I'll never have any time to bring to life the ideas I have in my head if I keep making things for other and putting them in envelopes.


That said, I love them, I enjoy making the blocks and I am always really excited to see the finished product and I can ususally make them at night after work which makes a great weekday stand alone project.


I think I'll probably keep ignoring my own little rules for myself but that is OK.


The most recent bee I joined was one hosed by the online Etsy fabric store Sew Fresh Fabrics. As they explained in this post on their blog they end up with a lot of scraps and thought a bee was a great way to use them with the final quilt being donated to charity, in this case Project Linus.


I thought I had missed out on the first round but apparently due to some counting errors they ended up one short in the boy group for this round and I was happy to jump in. Yesterday I got an envelope in the mail (yay!) with some Kaffe Fasset, Lizzy House and other great fabrics and from nowhere came the idea to make a aeroplane block.


I have never, ever, had the slightest inclination to make such a block before but as soon as it popped into my head I couldn't think of any other style I wanted to make. So, by the power of google I went looking for some tutorials and used this one from Badskirt as my main inspiration but generally made it up as I went along within the confines of the fabric strips I had.


I love how the tail and wings stand out from the body and nose and how the busy-ness of the background print hides the seams. And the lighter fabric on the border gives the eye a place to rest (and makes the block to the requested size!). Genrally for an hour or so at the sewing machine a few hours after the envelope arrived I'm pretty happy.

Check out the Flickr group for some of the other great blocks appearing for the boy and the girl quilt made by the other circle.

Monday, February 7, 2011

A Quilt Block weekend

I've had a very quilt blocky weekend. I got a lot of thing finished so I can move on to my Doll Quilt and Scrappy Mug Rug Swap item this week.

1. Bee blocks for Kerry for Bee (a little bit) Japanese.
She asked for Floating Brick blocks with freecut wavy lines from her tutorial. A little scary but I like how they have turned out, a little short from lack of solid notwithstanding.

2. I also caught up on the first four Quilt Bloggers Block-a-Palooza blocks.
Block One - Geese over Fields by Quilt Dad 
Word Search by Oh Fransson!
Shoofly Geese by Sasikirana Handmade
Gingham Pinwheels by Cherry House Quilts 

3. And I make all of my blocks for this quarter of the 3x6 Bee Sampler Mini Quilt Bee.


 And just for fun a travel mug from the very first Moda Bake Shop Tutorial

And some great fabric in the mail on Friday!


I'd call that a productive weekend.

Thursday, February 3, 2011

Sometimes my Mind's Eye is faster than my Fingers


Just like you can have eyes bigger than your stomach so my mind's eye is a little faster than my fingers.

I've written up my lists and planned in this post and they are appearing on the sidebar on the right. The first attempt was a little deceiving. I wanted to see it I could get them there and didn't add much in the way of items to the list.

The revised lists are MUCH longer, I think I shocked a workmate when I was writing them at lunch yesterday. They covered an A4 sheet of paper.

I'm still hopeful I can get a graphic and make these look like a note pad and inspiration board but until then I need a place to keep my list.

It seems I won't be short of something to do for awhile!

Wednesday, February 2, 2011

do Good Stitches {a Charity Bee} - The Queensland Edition - Claire's Quilt Blocks

This first quilt will be for Claire, and is inspired by this quilt. I am tossing around a few size and layout options but the final decision on this will be made when I have all the blocks here.


The Block: The block is a Disappearing 9-patch, there is a short tutorial below because the block is not difficult but it can be used in many different ways to make very different looking quilts. I'm on a bit of a kick with them lately.


The Size: I have asked for blocks anywhere between 10-16" unfinished (or 9.5-15.5" when sewn into the quilt). I will then sash them with Kona Bone to make blocks up to 18-20" when I get them back. The effect will have the blocks floating.


The colours/fabrics: I have asked for the centre of the initial 9 patch to be made from Kona Bone Snow or white quilters cotton (the reason for this will become clear below) For the other 8 squares I'd like fresh coloured/tone fabric. As an idea I am thinking Nicey Jane from Heather Bailey, Kate Spain's Central Park, Joel Dewberry Modern Meadow, Camille Roskelly's Bliss, Sweetwater Sunkissed. The value of these fabrics will matter more than the colours, think spring. Of course you don't need to use the specific ones mentioned, that is just to give you an idea of the look I am going for. My samples below use one or two of these fabric only but give the same effect.
The execution:
Make a standard 9 patch block. When cutting and planning please remember to place your Kona Bone Snow or white quilters cotton square in the centre. When calculating size for these initial squares know that your completed block will be 1.5" less than 3x(you starting square size).


For example I made one sample block that was 15" unfinished when completed. I started with squares 5.5".


So 5.5"x3 = 16.5"
16.5"-1.5" = 15"


Step 1
Cut 1 square from Kona Bone Snow or white quilters cotton
Cut 8 squares from a variety of print fabric.
To make the size blocks requested these squares can be anywhere from 4" - 5.75" (all your square need to be the same size.


Step 2
Arrange your fabric with the Kona Bone Snow or white quilters cotton  in the centre and the prints around the outside. The squares in the corner will remain uncut in the final block.
Step 3
Sew the squares together, I sew the middle and left squares together from top to bottom by chain piecing and then the right most square to the other side of the centre square.
Step 4
Press the seams to the sides, alternating these left and right so you can nest the seams together when you sew the rows together.


Sew the rows together. Press the seams to one side (I usually do these in the same direction.


Step 5
Cut the block in half vertically then horizontally.


To work out where to cut measure the centre block and divide by 2.


This centre block measures 3.5"
so I measure 1.75" lining up the grid on the ruler with the side seam and the top and bottom seam to keep it square.


Cut vertically
And horizontally, one at a time. 
You will end up with 4 squares.
Step 6:
Arrange these four squares in the layout of the block. The small bone squares should meet in the centres on two square and on opposite top and bottom corners as pictured.
Sew the vertical seams, press seams left and right away from the bone centre, nestle and sew the horizontal seam.
Done!

Sashed the outer Bone square will disappear  into the sashing.