
The description suggests that the block is called 'Stacked Hex' or 'Running Hex' but for the life of me I can't find the hexagon unit in it. If you can please tell me, it is driving me insane. But in the absence of such sight I drafted myself a block and will add the setting triangles between it and the sashing for a twin size quilt when they all return.
I'm calling the block 50's Crystal for a lack of knowledge as to the real name.
***EDIT*** Lisa has pointed out that the finished block has six sides, and is therefore a hexagon. There might be some goemetry experts out there that would argue the case and point out the six sides are not equal in length but I think they would be nitpicking. Maybe I should be calling it a Stacked Hex block afterall.
Apologies for the dark, rubbish pictures. No matter what I do I can't seem to get a good picture at night and that is when I get to sew.
50's Crystal Block Tutorial
For each block you will need
1x 6" square of dark print
2x 5" square of light print (I used a print and solid)
1x 4" square of light print cut on point.
I have described where I used the dark and light print - my sashing will be reasonably dark and that has impacted my placement but switching them would give an effect more like the inspiration quilt.
Construction
Step 1: Making the end units

Place 5" Squares right sides together and draw a line corner to corner. Sew 1/4" each side of this line.

Cut along the drawn line, press seams to set and then press seam towards the print.
Trim these units to 4" square. Place your ruler with the 45 degree mark on the seam line ensuring the edge of the block extends beyond the 4" mark on your ruler.

You will now have the 3 centre squares that are sewn into the block on point.

Step Two: The setting triangles
The 6" square will be cut into 4 triangles like you are cutting a sandwich.
First cut corner to corner diagonally.


Press to set all seams and then press seam allowances towards the setting triangles.

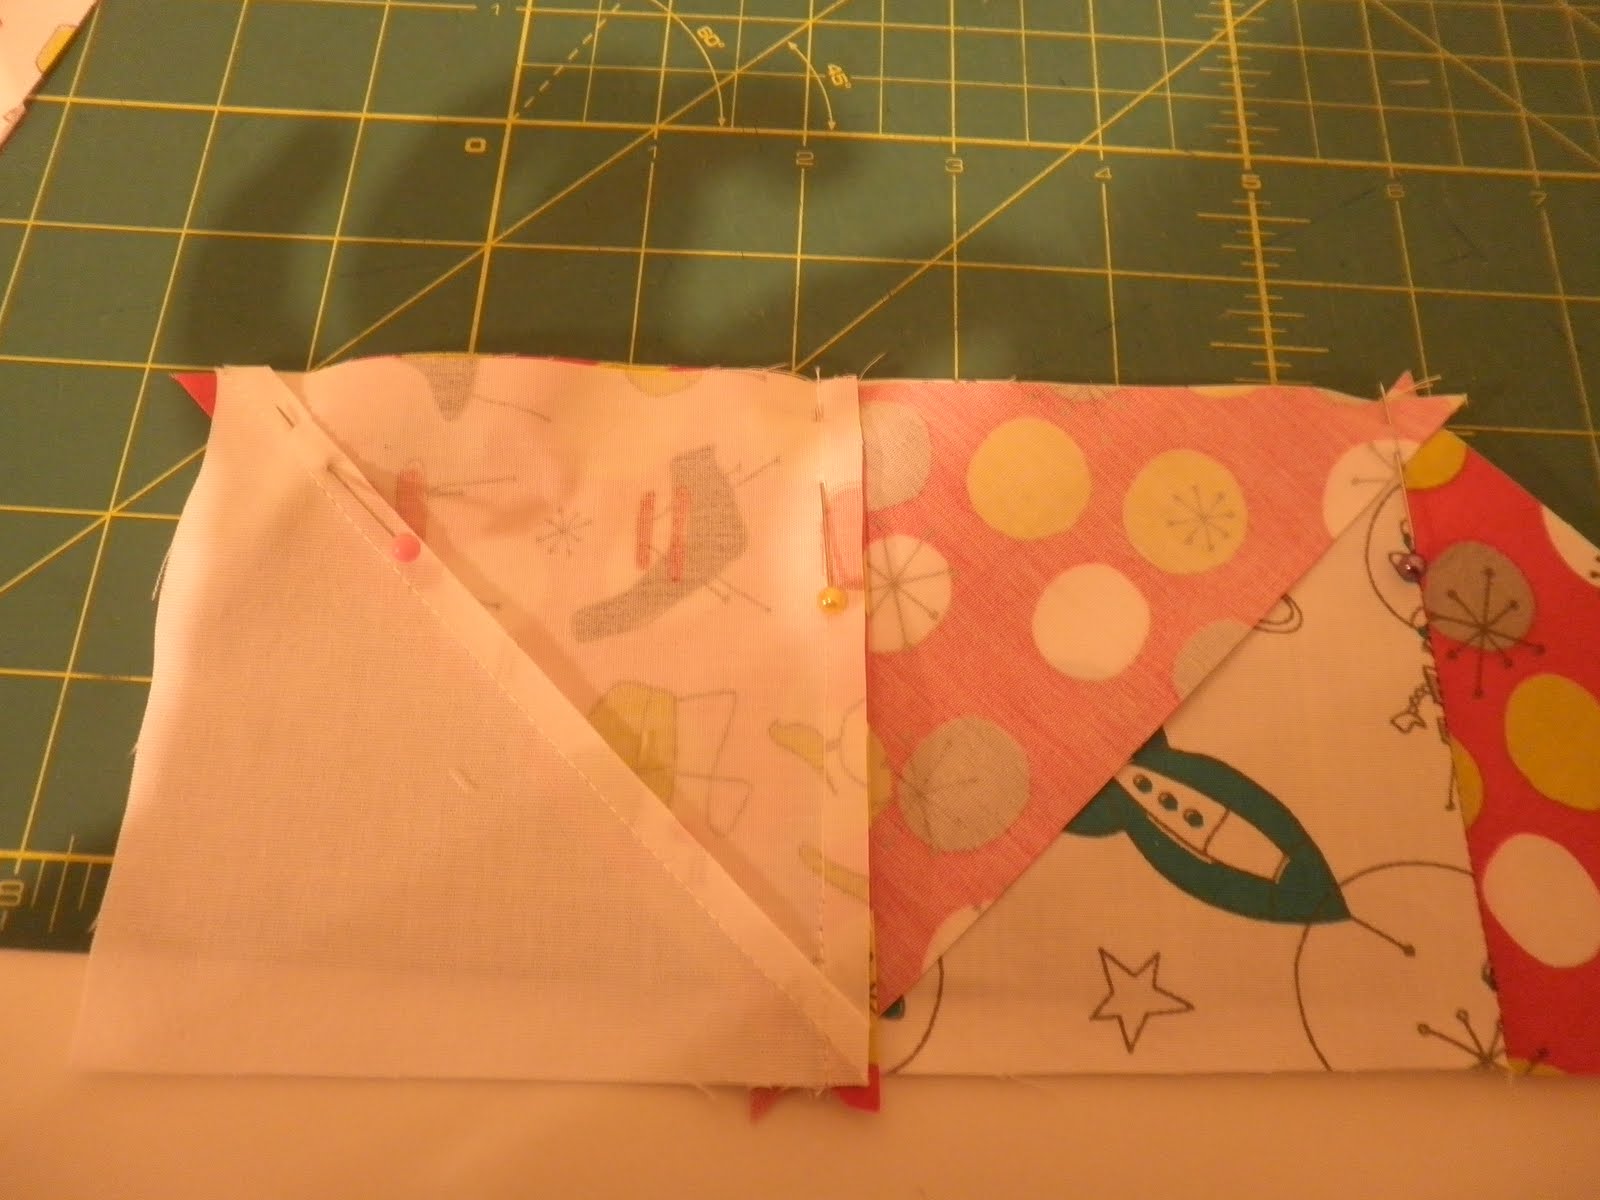
Step Three: Joining the units.
The last step is joining the three units.

You want the seams to match and that 1/4" tag at each end of the seam as shown below.

You're done!
There are a lot of pictures in this post spelling out what might seems to be really basic steps but they do help make a precise block. The blocks actually don't take that long to make either but I think they will look pretty effective on mass!
1 comment:
Love your choice of block. Isn't the hexigon the whole block, i.e. a six sided shape?
Post a Comment