Showing posts with label block. Show all posts

Sunday, February 3, 2013

...falling off the wagon...into a pile of scraps.

Almost as soon as I started the Craftsy BOM with my scraps it became abundantly clear that I was going to go nowhere near far enough into making a dent in my scrap stash. So I started a new quilt, even though I was trying to focus in finishing the ones I had started. 


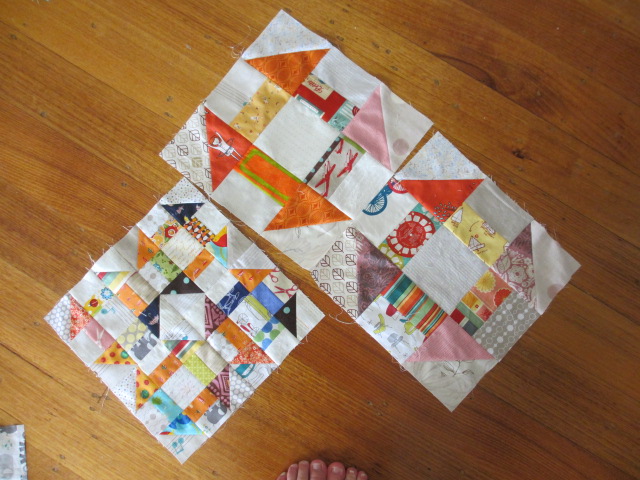
I'm working though the My Favorite Block QAL and making a number of blocks from each post with the aim of ending up with a top 7x7 blocks in the 12" size - big enough for our bed.


This one is four 12.5" blocks - I wish I hadn't used the brown!


The Road to Oklahoma especially needed to be repeated I think.


So far I have made at least 4 of all the blocks (I am finding many of them are better repeated to show a secondary pattern) and am well on the way. I'm using 'low volume' fabrics as the link between all the blocks and so far the block are linking OK I think though I am finding the whole things very busy and a departure of my usual style.


Blocks come out twice a week so I hopefully in another week or two I will have a better idea if it is going to work or I with end up with a really scrappy mess!

Monday, January 21, 2013

...a happenstance and a plan

While I don't think I am in the league of the people that are featured in hoarders my fabric scraps are out of control. 

The 'problem' I have is that while I can still think of something I could do with them, and there are no shortage of ideas in that department, I have no real desire to re-house them. 

That said, I am happy to use them - and really enjoy putting them to use in the do. Good Stitches blocks for the Cherish circle (in fact the chance to use these small gems was one of he reason I joined this bee). But still the boxes keep bulging and the scraps keep spilling out. 

And I refuse to solve the issue by buying more boxes. 

And them comes the happenstance. I was mindlessly wandering around the Fresh Modern Quilts group on Flickr recently and came across this quilt, described in more detail here. And then I wandered over to Craftsy and looked in on the free 2013 block of the month. And I signed up. 

My plan is to use stash for this quilt. with a focus on all the little bits and pieces in the scrap boxes. With bits and pieces of my text fabrics as the background. 

Tonight, after I finished the second of a couple of quilt tops to be revealed later in the week I sewed up the first four blocks. I'm looking forward to the next 11 installments!

Tuesday, January 8, 2013

...doing good stitches in January

It feels like ages since I last made a bee block, and I guess in a way it is. In the Cherish circle we take December off so I last made a block in November and I made it the first weekend of the month so it has bee about 10 weeks. Ages!

This month Kim asked for star blocks in blue and white.


I chose to make Another Star by Beth Gutcheson using the tutorial from Fresh Lemons Quilts. I constructed mine a little differently by sewing the first strip on the center square using a partial seam and the finishing it off after the other three strips were sewn.


I also chose to make the Evening Star block using the tutorial by Swim, Bike, Quilt published as part of the Summer Sampler series. I also changed this one up a bit by using a single piece to make the star points.

I can't wait to see how this quilt turns out!

Monday, April 30, 2012

...planning stitching and crackers (do. Good Stitches March Cherish Quilt)

This post is about the quilt I have designed for the next month of the Cherish Circle in do. Good Stitches {a Charity Bee}


I make no claims the that following block design or colour choices are my own. I have taken ideas and inspiration from this design on the Moda Bakeshop by Mary from the Tulip Patch and this block by Angela from Cut to Pieces. A colour plan came from the Warm and Cool quilt along hosed by Jeni from In Color Order. I have chosen to revise the block tutorials highlighting the measurement of block components and colour placements for clarity and the ease of use by my bee mates. So here goes!


This month we will each be making one larger than average block that is constructed in four quarters (two warm and two cool in this design). 


To construct the whole block you will need


(4) 6" square of white (any will do but please avoid creams, light greys and beige
(2) 6" warm colour squares (or 4 triangles cut from 2 6" squares) 
Cross cut all of the squares into triangles

(2) 6" cool colour squares  (or 4 triangles cut from 6" squares)  
(4) 2 3/4" x 7 1/4" cool colour rectangles

(4) 2 3/4" x 7 1/4" warm colour rectangles 
(4) 2 3/4" x 7 1/4" rectangles of white (
any will do but please avoid creams, light greys and beige )
Note: As part of the Quilt Along Jeni had a great primer on Warm and Cool colours, worth a read here. Like her, I am looking for colours that are medium value but on the warm or cool spectrum. Sticking to the medium value should help the blocks to fit cohesively together. 

This would be the time to raid your scrap box to get a huge variety of fabric colours and prints. The hardest to include variety in will be the squares (to become the corner triangles) because of the way they are cut but if you have some off cuts from large HST this would be a great use for them. 


Constructions
1. Make the centre units 
Sew a warm (cool) strip to each side of the white strips. You will end up with four units, two warm and two cool. Press seams towards the coloured strips. 


2. Sew on the coloured triangles
- Find the centre of the centre white rectangle and the centre of the long side of the triangle. To do this fold the units in half and finger press the centre, be extra careful when doing the triangle so as not to warp the bias edge.

 - Match the crease marks and sew triangle to the centre square. Press the seams towards the coloured triangle on the warm blocks and the centre unit on the cool blocks. 
- You will end up with something that looks like this. 
- Repeat with the other three units. 

3. Sew on the white triangles
- Using the same method find the centres again. 
- Match the crease marks and sew on the white triangles. Press seams towards the triangle on the cool blocks and the centre unit on the warm blocks. 
- You will have one quarter unit completed!
- Repeat with the other three units. 

4. Trim your units
- The units have been deliberately oversized. They will be trimmed to 10" square. I find having a square ruler really helps me do this and this is how I have done it in the pictures but there is not reason is can't be done with a straight ruler. 
 - Place the ruler over the completed block, matching the mark 1/4" from the edge of the ruler with the spot where your centre unit and triangles meet. This will ensure you are left with a seam allowance that will not cut off your points when you join the units!

5. Sew your units together to make a block!
 - Lay your units our with the coloured triangles meeting in the middle and the units forming an 'X' of sorts. 
You will want the warm units on the top left and bottom right. 
 - Pin the units that form the top row together matching the points and sew. Press towards the 'Warm' block. 
 - Repeat with the bottom row, again pressing towards the warm block. 
 - Sew the two halves together nesting the centre seam and matching the triangle points. 

Your block will be about 19.5" square and finish in the quilt at 19"


Success! Thanks so much 'Cherish' Bees!

Tuesday, August 30, 2011

...Sew Australia - A Bee Block Tutorial

My month in the Sew Australia bee has less snuck up on me, rather arrived with no smaller pile of things to do and little planning for the bee being done until recently. My thinking went something like this. I want a block (and a quilt) that is not the same as all the others (don't ask me to explain what I mean by same and others - I don't know). And I had fabric already chosen and bought so whatever I came up with had to be something that would suit, and feature, the novelty prints. The fabric is Circa 50 so I was thinking a 1950's design. Google couldn't help me with that but I did spy this quilt.


The description suggests that the block is called 'Stacked Hex' or 'Running Hex' but for the life of me I can't find the hexagon unit in it. If you can please tell me, it is driving me insane. But in the absence of such sight I drafted myself a block and will add the setting triangles between it and the sashing for a twin size quilt when they all return.


I'm calling the block 50's Crystal for a lack of knowledge as to the real name.  
***EDIT*** Lisa has pointed out that the finished block has six sides, and is therefore a hexagon. There might be some goemetry experts out there that would argue the case and point out the six sides are not equal in length but I think they would be nitpicking. Maybe I should be calling it a Stacked Hex block afterall.


Apologies for the dark, rubbish pictures. No matter what I do I can't seem to get a good picture at night and that is when I get to sew.
 50's Crystal Block Tutorial


For each block you will need
1x 6" square of dark print
2x 5" square of light print (I used a print and solid)
1x 4" square of light print cut on point.
I have described where I used the dark and light print - my sashing will be reasonably dark and that has impacted my placement but switching them would give an effect more like the inspiration quilt.


Construction
Step 1: Making the end units


 Place 5" Squares right sides together and draw a line corner to corner. Sew 1/4" each side of this line.


Cut along the drawn line, press seams to set and then press seam towards the print.


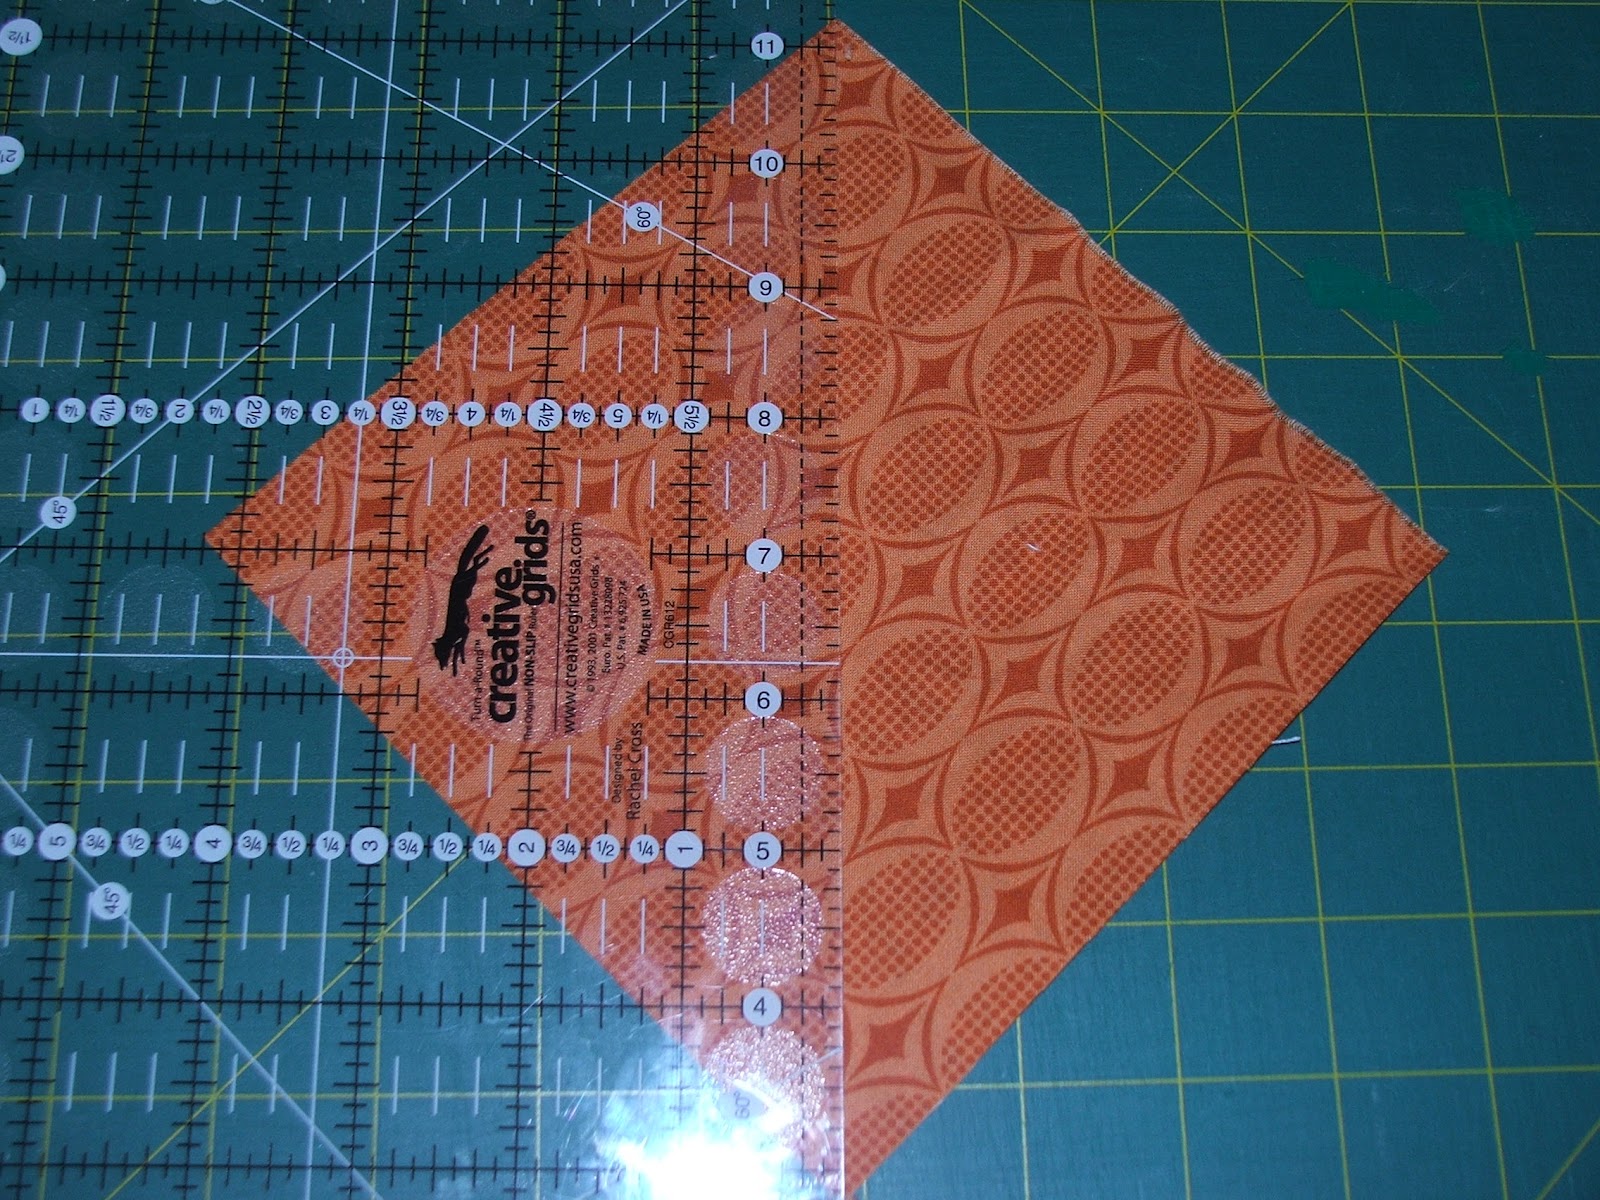
Trim these units to 4" square. Place your ruler with the 45 degree mark on the seam line ensuring the edge of the block extends beyond the 4" mark on your ruler.
Trim the two sides and then turn the block, line up with the 4" line again and the 45 degree line and trim the final two sides.


You will now have the 3 centre squares that are sewn into the block on point.


Step Two: The setting triangles
The 6" square will be cut into 4 triangles like you are cutting a sandwich.
First cut corner to corner diagonally.
And then cut the resulting triangle in half again. It helps to position the 45 degree line on the side and the ruler on the point to ensure your halves will be equal. I find cutting one and a time makes this more accurate.


 Lay out your setting triangles with the square units you made in the previous step. The blocks will be orientated vertically in the final quilt so please orientate the squares in this way when laying it out. The solid white triangles should be on the outside.


The triangles will extend 1/4" beyond the square on one side. Match the top corner (right angle corner) of the triangle with the corner of the square as shown in the picture above.


Sew a one triangle to each of the end squares and two to the middle square.
You will end up with three units as shown above.

Press to set all seams and then press seam allowances towards the setting triangles.


Step Three: Joining the units.
The last step is joining the three units.

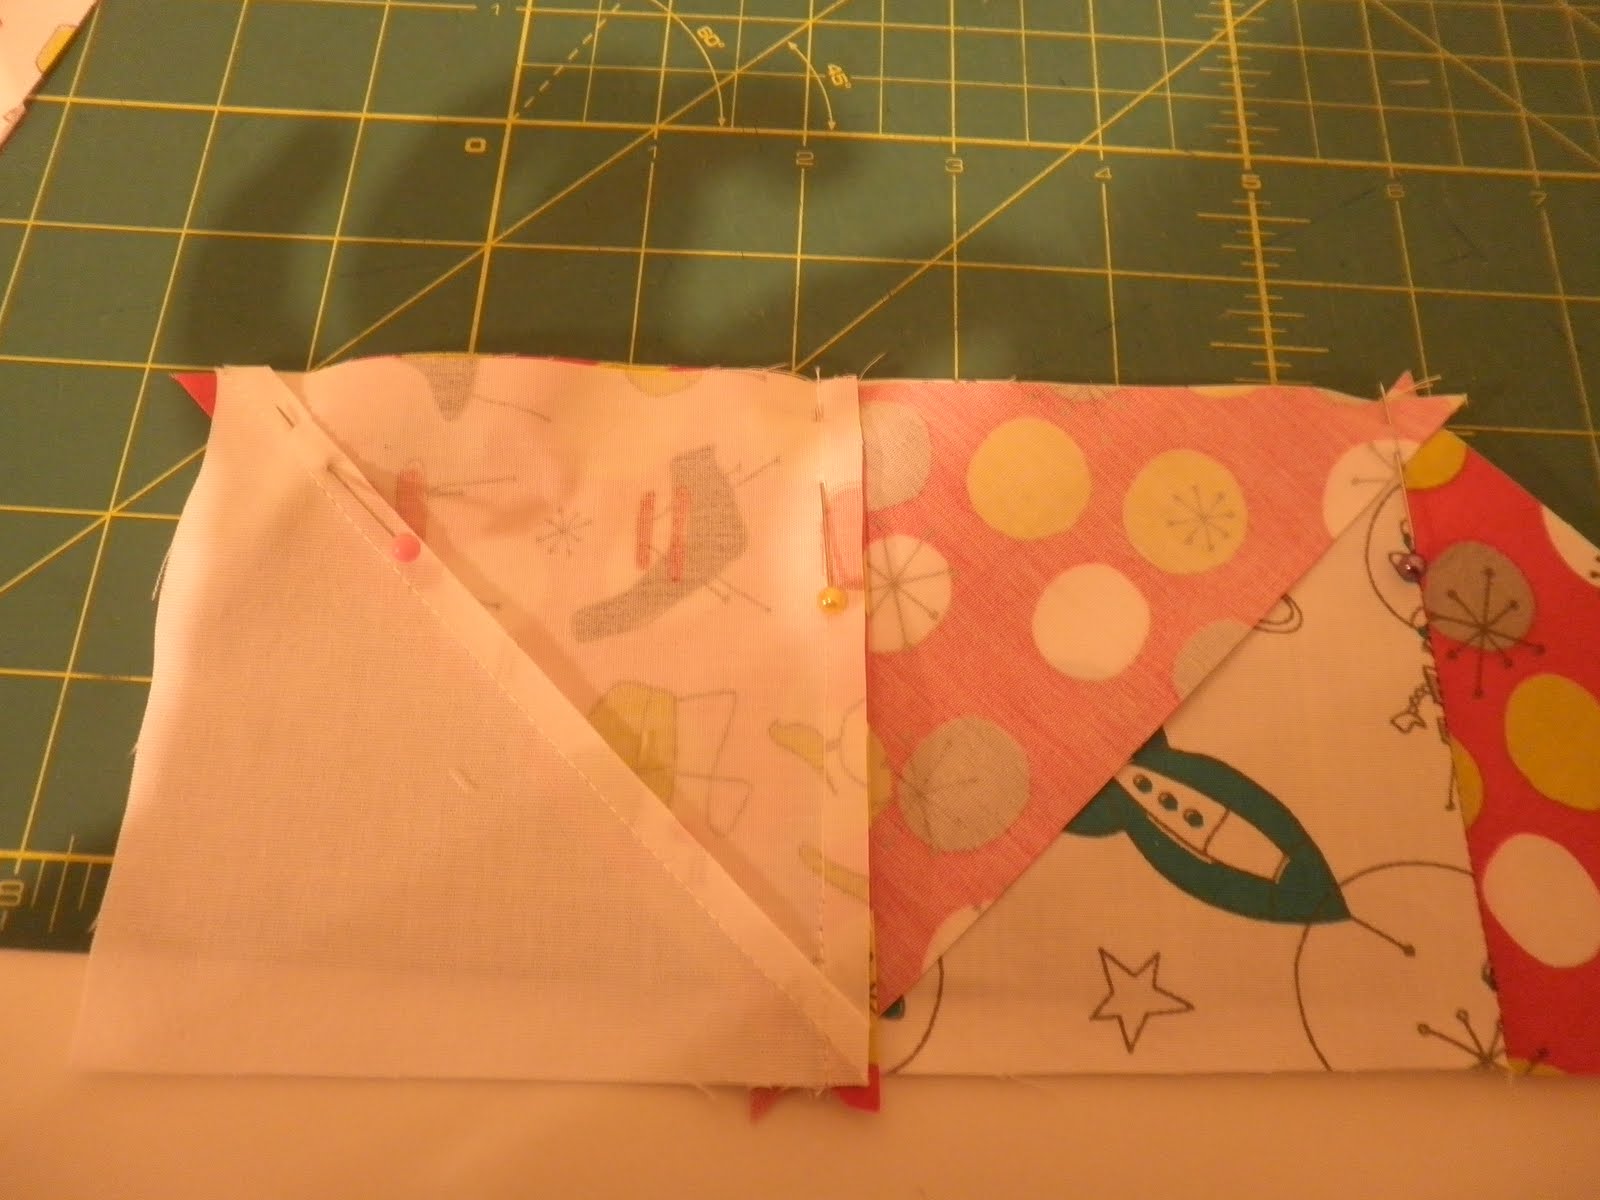
Nest the seams as shown in the picture above and pin on the seamline. Your prints and whites will be right sides together as shown in the picture above as well.
You want the seams to match and that 1/4" tag at each end of the seam as shown below.
Sew both joining seams and...
You're done!

There are a lot of pictures in this post spelling out what might seems to be really basic steps but they do help make a precise block. The blocks actually don't take that long to make either but I think they will look pretty effective on mass!

Saturday, July 23, 2011

...Doll Quilt Swap II - the beginning

About two months ago I looked around my sewing room and notice how many quilt I had almost done, just started or stacks of fabric waiting with a specific quilt in mind and decided that I needed to concentrate on these things before joining any more swaps. They are heaps and heaps of fun but I have limited sewing time and I need to remember things always take longer than I think it will. 


But then I saw a post on the Doll Quilt Swap Flickr group discussion page about the theme for this round - miniatures - and I couldn't resist. 


So I have spent some time working out the maths to sew some smaller blocks. Based on my secret partners preferences I came up with two options.
DQS 11 - Option One
DQS 11 - Option Two

I have decided to go with the second option. I do like the stars in the hexagon but someone else is also doing one very similar and I would like to be a little individual!

I have started cutting and piecing this afternoon, almost all from my scrap containers. Only the star centres is cut from a 'new' half yard from the fabric cupboard.  

Each of the blocks will finish at 3" and there will be 16 blocks making a quilt of just over 12" square. For such a small quilt there are a lot of seam to sew, and still to go, but I'm pleased with how it is turning out so far. 

Thursday, July 14, 2011

...Bee a (little bit) Japanese quilt top

...and back.

For my month in this bee I sent a range of cotton/linen blend fairytale themed fabric and some chocolate quilters linen.

I asked my bee mates to make mod mosaic blocks with this tutorial from Oh Fransson.

I have sewed them into a quilt top, and back alternating the blocks with solid chocolate quilters linen blocks.

Now my finger is almost mended I can get to basting and quilting.  

Tuesday, June 28, 2011

...3x6 Bee blocks

Thanks to everyone about their supportive feedback from yesterday. I have really appreciated all the comments and I am so glad the quilt is well received. 


The second bee blocks of June ... for the 3x6 Bee - although this is a little cheating because I finished them in May but couldn't get them photographed, packaged and mailed until a few weeks ago and blogged until now.
For Beehive 25 - 2nd Quarter 2011
I chose to make these from a pattern in the 100 Quilt Block magazine. There are from the Third volume and were designed by Gerri Robinson from plantedseedsdesigns.com. 


All in all I made 8, the six for my bee members, one for me and one extra because I misread the spreadsheet.


And all of that added up to 64 HST, 64 flying geese units and a few extra small squares and rectangles. I think they look pretty good and I hope my bee members appreacite theirs when they get to see them in person soon which should not be too long as they have stared arrive. This bee is going through a few  changes at the moment meaning the next round is a few weeks away but I am looking forward to the next round!

Thursday, May 26, 2011

...what I was doing last night

I was putting together the blocks for May in Bee {a little bit} Japanese!

This month Christine had asked for two block different to each other but that would be used to make a quilt for her nephew Zac. So we have each made a Cheaters 8 Pointed Star from this tutorial and a transport themed block of our choice.

I had actually been really looking forward to the star and it really did come together wonderfully. Because of the placement of the solids and prints all the HST were cut across the centre exposing the bias before sewing which didn't really phase me.

What I was both a little peeved and a little please with was the cutting directions allowing some extra to trim the units down before sewing the blocks together. And when I say a little I mean a lot. I think I cut about 1/4" to 3/8" off each side. And when you are thinking about a whole quilt that is a lot of extra fabric. If I was to make the block again (which I just might I would probably cut the larger squares to 4"-4.5" and I think this would still leave heaps of space to cut the HST units to to 3.5".

The other blocks of this type in the Flickr steam so far all seem to have a blue background so I am waiting patiently to see if my little yellow fella has a friend in the final quilt.

For the second block I could not go past the aeroplane I have made in the past based in a Badskirt tutorial. I mean what little boy doesn't love a plane?
The fabrics for this block (in a separate bag, Christine was so organized.. my hero) were most solids in primary colours and I thought a red plane was just perfect. The blue surrounds is a little sky-like and the white stripe I think makes is most surely racy!
And because the plane is for Zac surely the airline should be named after him, right?
I can't wait to see this quilt together - I think it will be a sure fire winner!


Monday, May 16, 2011

...of the weekend

Lots of sewing and a little (unphotographed) sewing and baking.

Nothing finished though so no pretty and polished pictures to show. How about some unfinished and unpolished progress ones instead?
 At the Melbourne Modern Quilt Guild Sit and Sew day the first of the cogs for Nik's Cogsmo Cog and Wheel Quilt that I cut out at the last SASD. It was all going well until I sewed on the background  and it all went out of shape. I think I may have got some of the 5 and 5R pieces around  the wrong way. I'll work it out after I've unpicked a few stitches...
And because I haven't got enough projects on the go I started sewing some strip sets for the Postage Stamp Quilt-Along hosted by Rachel I missed but bought the supplies for in January.
Fabric: Giddy by Sandy Gervis
And I cast on some socks, inspired by some on sale wool with a pattern on the band and out cold temperatures last week. I have got this far and it seems a bit beyond my limited knitting abilities so I am keeping this one to keep trying at and sending the other ball for the second pair to Mum to finish. When she visits in another couple of weeks she might get this one too :)
I have made some great progress on the bakery project. Ready for basting and quilting. I have plans for the latter that are a little different than other projects featured on that site.


Thursday, March 31, 2011

Sometimes all it takes in an hour....

I really enjoyed making Claire's quilt for her and I have mentioned many times on my blog and earlier on my facebook page that I enjoy crafting for others and I find completing charity projects or collaborative quilts to be enjoyable and personally satisfying way of doing this.

But as you can see on the RHS of the blog I have a VERY long list of things that I have started, have planned or would like to try and there are only so many hours in the day and big projects can get left unfinished.

But sometimes all it takes is an hour (or just over if you keep ducking into the other room at the end to watch the beginning of City Homicide) and a little bit of mess.
These first two blocks were made for Abi from the Bee Seam Piecing Downunder. She very sweetly asked the other members of the bee and I a few weeks ago if we would be willing to make some quilt as you go blocks based on sewtakeahike's tutorial.

She will be adding these to those she receives from another bee she is involved with after forgoing her month and asking for these blocks in return. Of course they went right on the list.

This block is to be included in a playmat quilt for another member of this bee, Kelly, and her yet to be born second child.
Nicole had the wonderful idea and suggested stars of various styles from this tutorial from Silly BooDilly based on a concept by Gwen Maston from Liberated Quiltmaking - the first one.

Thursday, March 17, 2011

A Quilt for Claire - do. Good Stitches {a Charity Bee}, the Queensland Edition

I have been turning the block I received from the Faith circle members of the do. Good Stitches {a Charity Bee} into a quilt top ready to have it finished and on the way to Claire by the end of the month.

I asked for disappearing nine patch blocks in spring colours and wrote up a very quick tutorial in this post. I have been adding the white borders over the last couple of days and sewing the rows together.

At the beginning I was going for a double sided 3x3 grid. With each of the boarded blocks being 18.5" finished this would have ended up about 55" square, and double sided. But too small I think.

The other option in mind was to make the front in a 3x4 grid and have a single row on the back, or maybe two if I made two extra blocks (or the two in the mail turn up*). The quilt would end up more of a single bed size then and still be reversible but different on both sides. But I was still worried it would be just too narrow or too short.

In the end I went with a 3x5 layout, meaing the quilt will finish at 55.5"x92.5".
With the two most common single mattress sizes in Australia being 36"x74" or 42"x80" I'm hoping it will serve a purpose in this layout.

The plan is to quilt it in grid style with organic straight lines about 6" apart, I just need to get a backing first. I am thinking an IKEA cotton fabric. I really don't want seams in the back and I think the aesthetic in some of the Scandinavian prints might be just right.

*Note: I want to, for clarity, make it very clear I am not having a jab at anyone in my bee for blocks not arriving but Australia Post. In the last 2 months 3 items I am aware of have simply not arrived, two to my home and one to the post office box. This includes a Registered Post parcel that I am told I signed for, except at the time I was 50km away in a meeting at work.