Showing posts with label Cherish. Show all posts

Tuesday, January 8, 2013

...doing good stitches in January

It feels like ages since I last made a bee block, and I guess in a way it is. In the Cherish circle we take December off so I last made a block in November and I made it the first weekend of the month so it has bee about 10 weeks. Ages!

This month Kim asked for star blocks in blue and white.


I chose to make Another Star by Beth Gutcheson using the tutorial from Fresh Lemons Quilts. I constructed mine a little differently by sewing the first strip on the center square using a partial seam and the finishing it off after the other three strips were sewn.


I also chose to make the Evening Star block using the tutorial by Swim, Bike, Quilt published as part of the Summer Sampler series. I also changed this one up a bit by using a single piece to make the star points.

I can't wait to see how this quilt turns out!

Monday, July 9, 2012

...making links

When I posted about my vision for the May do. Good Stitches quilt by the cherish circle I was thinking the block would be a good scrap buster for the bees in the circle, would make a decent sized quilt and the blocks would look like little chain links, hence the name. 

When I went to think of a title for this post I also though - hey, it links us all as well. I'm not too quick with things like that sometimes. 

The top came together really quickly thanks to the 12 oversized blocks it is made up of and basting was completed over the weekend when I scrounged enough basting pins from the already quilted sections of the other 4 I am currently quilting (3 hand, 1 machine - yes I know, I'm crazy). 

I've been working on practising my free motion quilting for a little while now, mostly on smaller pieces and I felt ready to tackle a larger project. In the centre of the links I FMQed some lines, Amanda Jean style, and then in the larger white squares went back and made some spirals to soften some of the lines. I'm pretty darn pleased for a beginning effort. I'd like the spirals to be a little more round and a little less egg shaped but I can't draw that well with paper and pencil so I don't think I can expect miracles with thread and fabric. 

I used a Gutterman Sulky 30wt in white cotton and I found it really good to use with only a few breakages (which I really think was down to my technique and not the machine). 

It's bound in a white solid from my stash which I think frames it nicely and blends well with the Little Things fabric used on the back. 
It measures about 59"x 78" so it is a good size and it will be off to Needy Stitches later in the week when I head down that way for work. 

Sunday, July 1, 2012

...crafty time

While I'm not a teacher I work in schools and with students so when school holidays come around I don't have to leave for work so early in the morning or work quite so last. This weekend marks the beginning of two weeks of this quieter, less frantic work time and in just my style I have a long, long list of crafty plans.

This weekend saw me have a very crafty themed weekend with a fun Sit and Sew evening on Friday night (with the start of my Hexy MF after my papers arrived and I finally decided on my fabrics - but more on that later), a very sad craft show on Saturday with some not sad at all company and lots of sewing and other things. Let's hope I haven't burnt myself out too early!

Top of the list was the blocks for June for the Cherish circle of do. Good Stitches. Melissa had asked for Granny Squares with and extra rounds and pink as the last one (she had sent us the spots to be used for one of them). Given the larger size someone had dubbed them Great Granny squares - a good name I think!
It was good to be able to put some of the 2.5" scrap stash I cut up ages ago to good use.


She has asked they be sent back untrimmed but I folded some of the sawtooth edges over to see how the pinks will look together - OK, I think and I love the concept - looks much more like a 'real' Granny Square!

The other was also to get the top together for the May do. Good Stitches Cherish quilt - for which I was responsible for the design. I posted about my plan here and I am so please it has come together a lot like what I had in my mind. I have the backing and the batting ready to go - I just need to do the next thing on the list and finish quilting one of the quilts I have on the go to gather enough basting pins for the basting and quilting!

I hope to have this one quilted and bound in the next couple of weeks!

Sunday, May 13, 2012

...bee quilt update

 Earlier this month I posted a tutorial for my fellow bee makes in do. Good Stitches bee Cherish circle. The other ladies in this bee are so efficient two blocks have already arrived in the postbox and others are on the way.

As this bee only has 10 people per circle I made two extra blocks this morning so the final quilt will be a 3x4 layout and measure almost 60"x80".

Laid out in the front hallway with the door open to let in some light for photos it brightened up a dreary and cold Melbourne day although the air coming in with the light was quite brisk!

Monday, April 30, 2012

...planning stitching and crackers (do. Good Stitches March Cherish Quilt)

This post is about the quilt I have designed for the next month of the Cherish Circle in do. Good Stitches {a Charity Bee}


I make no claims the that following block design or colour choices are my own. I have taken ideas and inspiration from this design on the Moda Bakeshop by Mary from the Tulip Patch and this block by Angela from Cut to Pieces. A colour plan came from the Warm and Cool quilt along hosed by Jeni from In Color Order. I have chosen to revise the block tutorials highlighting the measurement of block components and colour placements for clarity and the ease of use by my bee mates. So here goes!


This month we will each be making one larger than average block that is constructed in four quarters (two warm and two cool in this design). 


To construct the whole block you will need


(4) 6" square of white (any will do but please avoid creams, light greys and beige
(2) 6" warm colour squares (or 4 triangles cut from 2 6" squares) 
Cross cut all of the squares into triangles

(2) 6" cool colour squares  (or 4 triangles cut from 6" squares)  
(4) 2 3/4" x 7 1/4" cool colour rectangles

(4) 2 3/4" x 7 1/4" warm colour rectangles 
(4) 2 3/4" x 7 1/4" rectangles of white (
any will do but please avoid creams, light greys and beige )
Note: As part of the Quilt Along Jeni had a great primer on Warm and Cool colours, worth a read here. Like her, I am looking for colours that are medium value but on the warm or cool spectrum. Sticking to the medium value should help the blocks to fit cohesively together. 

This would be the time to raid your scrap box to get a huge variety of fabric colours and prints. The hardest to include variety in will be the squares (to become the corner triangles) because of the way they are cut but if you have some off cuts from large HST this would be a great use for them. 


Constructions
1. Make the centre units 
Sew a warm (cool) strip to each side of the white strips. You will end up with four units, two warm and two cool. Press seams towards the coloured strips. 


2. Sew on the coloured triangles
- Find the centre of the centre white rectangle and the centre of the long side of the triangle. To do this fold the units in half and finger press the centre, be extra careful when doing the triangle so as not to warp the bias edge.

 - Match the crease marks and sew triangle to the centre square. Press the seams towards the coloured triangle on the warm blocks and the centre unit on the cool blocks. 
- You will end up with something that looks like this. 
- Repeat with the other three units. 

3. Sew on the white triangles
- Using the same method find the centres again. 
- Match the crease marks and sew on the white triangles. Press seams towards the triangle on the cool blocks and the centre unit on the warm blocks. 
- You will have one quarter unit completed!
- Repeat with the other three units. 

4. Trim your units
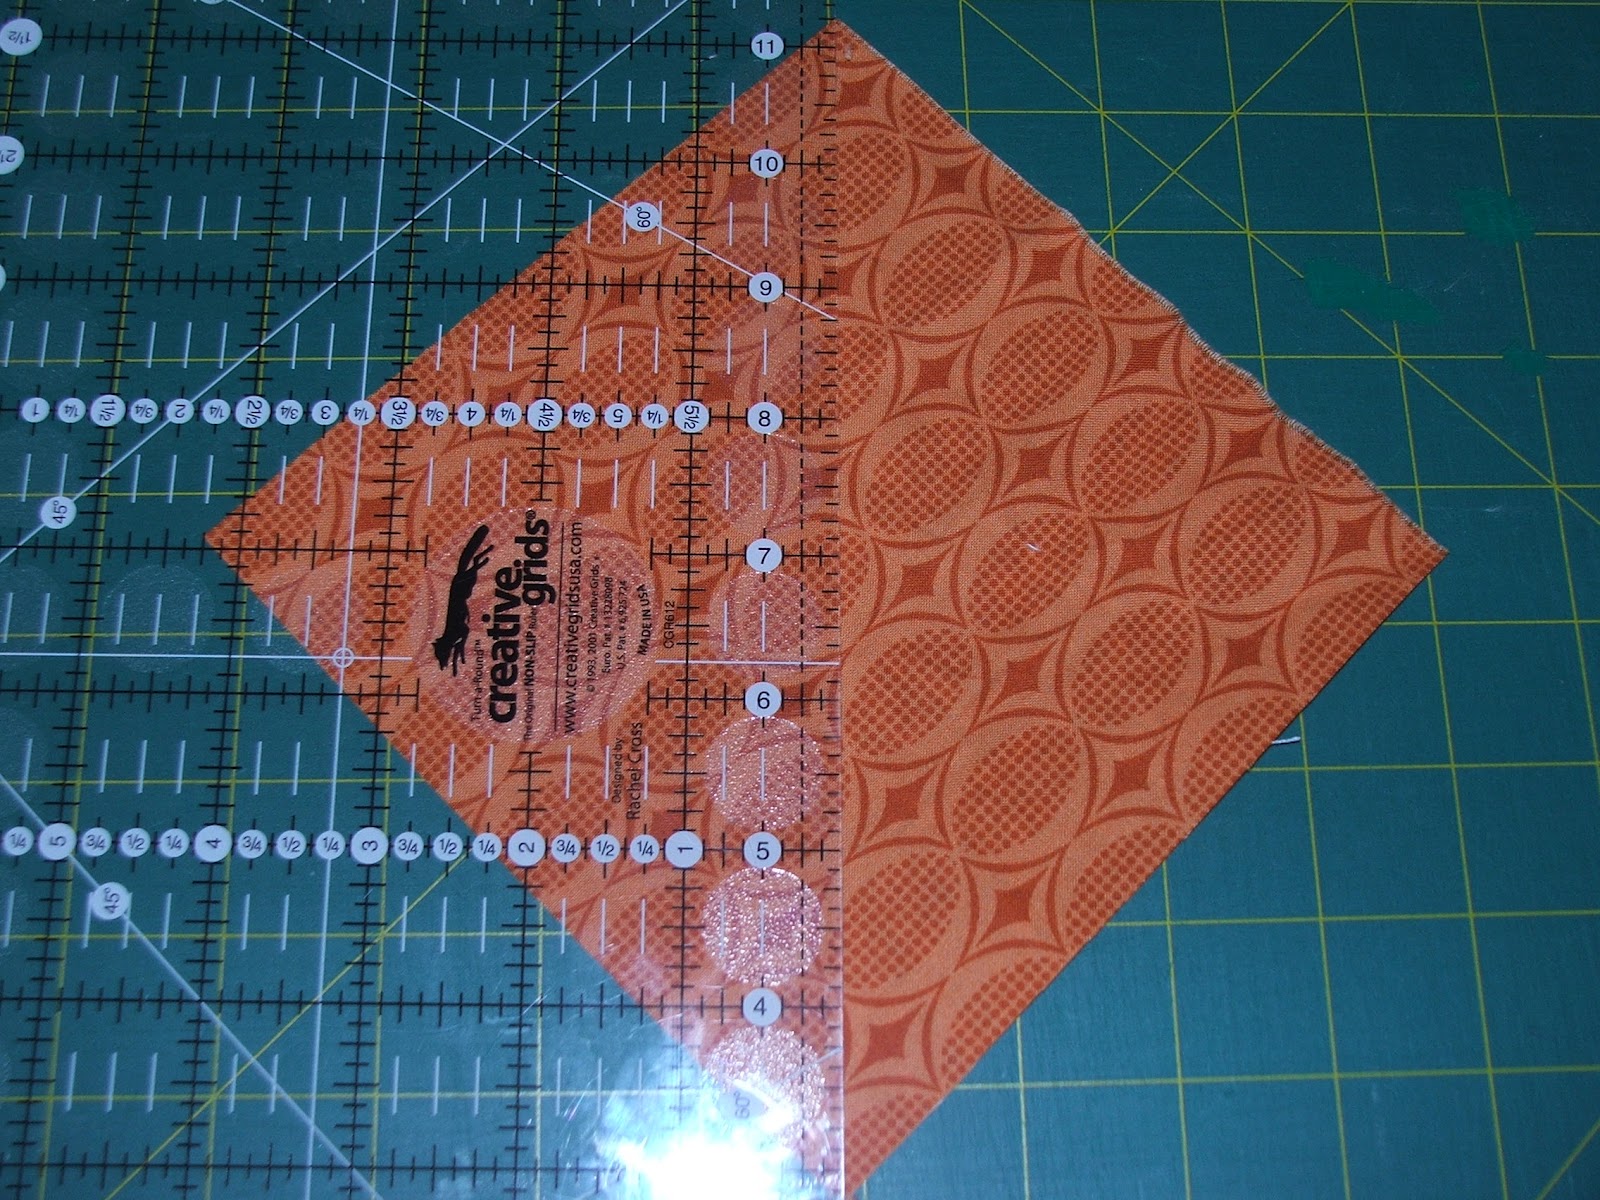
- The units have been deliberately oversized. They will be trimmed to 10" square. I find having a square ruler really helps me do this and this is how I have done it in the pictures but there is not reason is can't be done with a straight ruler. 
 - Place the ruler over the completed block, matching the mark 1/4" from the edge of the ruler with the spot where your centre unit and triangles meet. This will ensure you are left with a seam allowance that will not cut off your points when you join the units!

5. Sew your units together to make a block!
 - Lay your units our with the coloured triangles meeting in the middle and the units forming an 'X' of sorts. 
You will want the warm units on the top left and bottom right. 
 - Pin the units that form the top row together matching the points and sew. Press towards the 'Warm' block. 
 - Repeat with the bottom row, again pressing towards the warm block. 
 - Sew the two halves together nesting the centre seam and matching the triangle points. 

Your block will be about 19.5" square and finish in the quilt at 19"


Success! Thanks so much 'Cherish' Bees!

Saturday, November 19, 2011

...fine for ducks...and quilting

When I was 15 my family and I went on our first (and to date, only) overseas trip as a family travelled the massive distance to New Zealand. Come to think of it it wasn't such a short trip, we were coming from Perth and had top stop over in Sydney making the travel time quite awhile.

But I digress, sort of. At the time my brother must have been about 11 and had a little travel diary that he filled in. At the top of the page were spaces for a whole lot of information that the printers of the diary though essential for the traveller to record but the only stat I remember specifically is where you had to record the weather. I can't remember all the descriptions now but the one for rain was described as 'fine for ducks'. There were a lot of days that little box was ticked.

Today in Melbourne has been wonderful for ducks....and sewing.

So I have made my November blocks for do. Good Stitches Cherish circle. We had free rain this month on the block design but an aqua, orange and grey palette.

This block is Potager by Yvonne and featured in Modern Blocks.
The second is a Cracker Jack rip-off. The centre section of the block is actually a quarter of a block designed by Angela in this tutorial. I was all set to make the whole block until I came to the part where you trim the quarter and confirmed my suspicion that what I had was too big to be trimmed to 6.5". Note to self, read through the whole tutorial before starting in future.
I added the border to my 10" unit and am still quite pleased with it, and also quite sure I might put this tutorial to use for a quilt in the not too distant future.