Showing posts with label tutorial. Show all posts

Saturday, October 20, 2012

...how I EPP

So after my post from the other day I thought I should deliver with this one.

Well I didn't get this done for last weekend as I hoped but it's done now and I hope you find it useful!

EPP is not a quick sewing technique. But it can be taken many places. I will sometimes baste and sew when stopped at traffic lights or at a train crossing, a few minutes at a time in the car travelling from meeting to meeting during the day. And yes, on trips away.

I've read a lot of tutorials, seen a lot of people sewing and even gone to a class. Some I found useful, some not. I'd point you in the directions of the ones I had found useful but I honestly couldn't tell you which there were now. Like the technique itself the evolution of my technique has been a slow progression.

So in the interest of sharing the way I do it a little step-by-step. This is by no means the only way, nor even the only way I have done it. But it is the method that has stuck for me for the longest.

Step 1: Gather your papers and your fabric
I use store bought ready cut papers. I tried cutting my own for a time but I had trouble finding a weight I was happy with (150GSM was the best I could find) and consistency in my cut pieces.


Generally I use papers from Paper Pieces and Patchwork with Busy Fingers. They use different weight papers but both measure the shapes by the length of the sides so are pretty interchangeable. Both are of a quality that means I can use each paper 2-3 times. A more recent bonus is that Paper Pieces will no cut a custom shape for you at no extra cost than the normal cost of the papers if you let them use the design for other customers as well (if not you will need to pay the set-up costs as well).


When cutting my fabric I add a seam allowance of 3/8" rather than the 1/4" that is more customary in patchwork. This is so when I am putting the paper in the middle of the fabric it doesn't have to be prefect and if it moves a little I will still have sufficient allowance to wrap around.

Step 2: Prepare you paper and fabric pairs


I pair a number of fabric/paper pairs and then baste them. I like to secure the paper to the fabric by putting a small circle of Sewline basting glue in the middle of the shape. If it is something like a kite I also put  line down towards the tail. In a large diamond I might do a + shape from point to point. Hopefully you get the idea. I find this holds well over time, doesn't discolour the fabric, stops the paper moving around while basting and does not have the unpleasant side effect of distorting the paper that pinning has.

Step 3: Baste the paper to the fabric
This is probably the area I have tried the most different techniques. I wanted for a long to time to have success without needing to baste through the paper but it was just a no go for me.

I baste by putting the needle in from the front, leaving the knot there. I go anti-clockwise around the shape and take a stitch at each corner ( by pulling up through the fabric hat meets at the corner and then taking an overstitch) before reinserting the needle halfway down the next side.


When the shape is basted I leave a little tail when cutting the thread after overcasting  a couple of times but not knotting the thread.


Step 4: Sew the shapes together
When you get up to this step do yourself a favour and get a new needle. I use sharps for both steps but have two tubes, one marked for basting and the other for sewing.


Start by putting two shapes right sides together and inserting a needle with a knotted thread into the corner. Take a couple of stitches, make a knot or two by putting the needle through the loop of a partly sewn stitch.


Continue overstitching across the edge, taking small stitches and catching the fabric at the point it wraps around the paper but avoiding the paper.


At the end ake sure you go through the corner again and take the overstitches and make the knots again. If you are adding another shape on to this corner directly there is no need to cut the thread here.


Once you have sewn to the outer corner of this shape you will need to secure the thread and cut it. After some trial and error (and a few loose seams) I found that a combination of overstitches and knots works best for me. Much like a tennis player that has a consistent routine I do two over stitches, three knots (by passing the needle through the loop and another overstitch. Like with the basting leave a little tail when you cut the thread.

 Step 5: Removing the papers
Once all of the sides of a shape have been sewn to you can remove the paper. Because the knot was on the right side of the shape I can cut this off very carefully so as not to cut the fabric and then pull the stitches out.


The paper will just pop out (you may need to pull a little to dislodge the glue)


See how the paper shape is a little bent? That is fine and part of haw it has needed to be bent during the sewing phase. If you spread it out and press it down it fine to reuse.


Repeat, repeat, repeat.

It's not a fast way to get a quilt top, or anything else really but it is a good way to use scraps, have something handy to keep your hand busy and when done it is immensely satisfying.

Monday, April 30, 2012

...planning stitching and crackers (do. Good Stitches March Cherish Quilt)

This post is about the quilt I have designed for the next month of the Cherish Circle in do. Good Stitches {a Charity Bee}


I make no claims the that following block design or colour choices are my own. I have taken ideas and inspiration from this design on the Moda Bakeshop by Mary from the Tulip Patch and this block by Angela from Cut to Pieces. A colour plan came from the Warm and Cool quilt along hosed by Jeni from In Color Order. I have chosen to revise the block tutorials highlighting the measurement of block components and colour placements for clarity and the ease of use by my bee mates. So here goes!


This month we will each be making one larger than average block that is constructed in four quarters (two warm and two cool in this design). 


To construct the whole block you will need


(4) 6" square of white (any will do but please avoid creams, light greys and beige
(2) 6" warm colour squares (or 4 triangles cut from 2 6" squares) 
Cross cut all of the squares into triangles

(2) 6" cool colour squares  (or 4 triangles cut from 6" squares)  
(4) 2 3/4" x 7 1/4" cool colour rectangles

(4) 2 3/4" x 7 1/4" warm colour rectangles 
(4) 2 3/4" x 7 1/4" rectangles of white (
any will do but please avoid creams, light greys and beige )
Note: As part of the Quilt Along Jeni had a great primer on Warm and Cool colours, worth a read here. Like her, I am looking for colours that are medium value but on the warm or cool spectrum. Sticking to the medium value should help the blocks to fit cohesively together. 

This would be the time to raid your scrap box to get a huge variety of fabric colours and prints. The hardest to include variety in will be the squares (to become the corner triangles) because of the way they are cut but if you have some off cuts from large HST this would be a great use for them. 


Constructions
1. Make the centre units 
Sew a warm (cool) strip to each side of the white strips. You will end up with four units, two warm and two cool. Press seams towards the coloured strips. 


2. Sew on the coloured triangles
- Find the centre of the centre white rectangle and the centre of the long side of the triangle. To do this fold the units in half and finger press the centre, be extra careful when doing the triangle so as not to warp the bias edge.

 - Match the crease marks and sew triangle to the centre square. Press the seams towards the coloured triangle on the warm blocks and the centre unit on the cool blocks. 
- You will end up with something that looks like this. 
- Repeat with the other three units. 

3. Sew on the white triangles
- Using the same method find the centres again. 
- Match the crease marks and sew on the white triangles. Press seams towards the triangle on the cool blocks and the centre unit on the warm blocks. 
- You will have one quarter unit completed!
- Repeat with the other three units. 

4. Trim your units
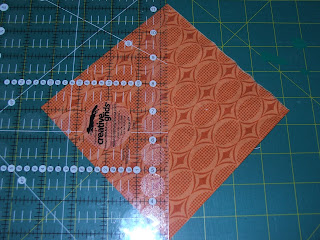
- The units have been deliberately oversized. They will be trimmed to 10" square. I find having a square ruler really helps me do this and this is how I have done it in the pictures but there is not reason is can't be done with a straight ruler. 
 - Place the ruler over the completed block, matching the mark 1/4" from the edge of the ruler with the spot where your centre unit and triangles meet. This will ensure you are left with a seam allowance that will not cut off your points when you join the units!

5. Sew your units together to make a block!
 - Lay your units our with the coloured triangles meeting in the middle and the units forming an 'X' of sorts. 
You will want the warm units on the top left and bottom right. 
 - Pin the units that form the top row together matching the points and sew. Press towards the 'Warm' block. 
 - Repeat with the bottom row, again pressing towards the warm block. 
 - Sew the two halves together nesting the centre seam and matching the triangle points. 

Your block will be about 19.5" square and finish in the quilt at 19"


Success! Thanks so much 'Cherish' Bees!

Saturday, February 18, 2012

...Salty Air at the Bakeshop

I can't stop making Bakeshop quilts! 

I have this one up over there today. It comes together surpringly quickly considering the number of pieces that it looks like it has. 

And because we are talking about it being constructed from traignale rather than diamonds there are no y seams!.

Please pop on over and have a look!

Saturday, December 17, 2011

...take anywhere placemat and cutlery set - a tutorial

At a recent craft show I took a quick class to learn a few more features on my overlocker and made a take anywhere placemat. I liked the idea of it but not so much some of the finishes so I have made up another with some different finishes.

This is a great project to use up some fabric and batting scraps and would be a great little gift for those that like to take lunches to school, work or anywhere!

Materials
You will need
4x (4"x12") strips of fabric 1 (mine is the Coal solid)
6x (4"x12") strips of fabric 2 (mine is the circuit board print)
5x (4"x12") batting strips
2x 2.5" WOF strips for binding
1x 2.5" WOF strip for tie

Optional - Small cutlery set. I used this one but these are cool too.

Construction
Step One
Cut out the fabric and batting as listed above


Step Two
Take two of your fabric one strips and three of the fabric two strips. Carefully position these on each of the five batting strips.
Iron these together to help them to 'stick' together.

Step Three
Place one of the Fabric 2 strips on the back of one of the fabric/batting pairs with the right sides out as pictured below.
Place one of the Fabric 1 fabric/batting pairs fabric side down on top and one of the unpaired Fabric 1.
You will end up with (from top to bottom) batting, Fabric 1 (RS down), Fabric 2 (RS up) batting, Fabric 2 (RS down), Fabric 1 (RS up). Check the picture below if that is clear as mud!
Note: You want all the edges to align, mine are staggered to help you see the order. 
Step Four
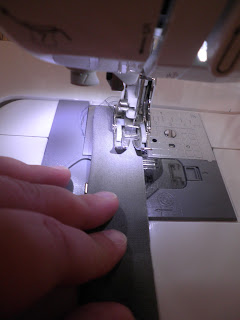
With a 1/4" seam (and I would strongly recommend a walking foot) sew down one long side of the sandwich
Flip both the Fabric 1 sections out so all fabric is right sides out with batting sandwiched in the middle.
Press
Layer the next section on top of the Fabric 1 section that you just pressed.
You will end up with the exact same sandwich with the Fabric 1 and Fabric 2 positions swapped.
Continue sewing the fabric to the previous section as before until you have 5 strips.

Step Five
Trim the top and the bottom of the joined sets to make a squared up rectangle.
Step Six Making the ties
Iron your tie fabric right sides together along the long edge.
 Using a 1/4" seam allowance sew across the short end, down the long side where the two raw edges meet and down the other short side pivoting at the corners 1/4" from the edges.
 Trim the corner, then cut the strip in half giving two ties
Turn the ties right side out and press. A good way to turn is to poke a pencil into the sewn end and then side the tube down the pencil.
Step Seven
Prep the binding by sewing the two strips together with a bias seam and then pressing wrong sides together down the links as you did for the tie.
Place the two ties in the centre of the long mat sides, with one on the front and one on the back matching the raw edges.

Sew the binding on the front of the mat, mitering at the corners. Fold the binding over the raw edges and secure with machine or hand stitches. I chose to use the machine for strength as I assume this will go in the washing machine fairly regularly.
Viola!

To fold the cutlery set in the placemat place the cutlery set in the centre as pictured.
Fold the left side to the centre
Then repeat with the right side.
Working from the bottom (the side without the tie turn the bottom up and then roll up, enclosing the cutlery set.
Wrap the ties around the bundle and tie in a bow. Pack yourself a picnic and enjoy!

Tuesday, August 30, 2011

...Sew Australia - A Bee Block Tutorial

My month in the Sew Australia bee has less snuck up on me, rather arrived with no smaller pile of things to do and little planning for the bee being done until recently. My thinking went something like this. I want a block (and a quilt) that is not the same as all the others (don't ask me to explain what I mean by same and others - I don't know). And I had fabric already chosen and bought so whatever I came up with had to be something that would suit, and feature, the novelty prints. The fabric is Circa 50 so I was thinking a 1950's design. Google couldn't help me with that but I did spy this quilt.


The description suggests that the block is called 'Stacked Hex' or 'Running Hex' but for the life of me I can't find the hexagon unit in it. If you can please tell me, it is driving me insane. But in the absence of such sight I drafted myself a block and will add the setting triangles between it and the sashing for a twin size quilt when they all return.


I'm calling the block 50's Crystal for a lack of knowledge as to the real name.  
***EDIT*** Lisa has pointed out that the finished block has six sides, and is therefore a hexagon. There might be some goemetry experts out there that would argue the case and point out the six sides are not equal in length but I think they would be nitpicking. Maybe I should be calling it a Stacked Hex block afterall.


Apologies for the dark, rubbish pictures. No matter what I do I can't seem to get a good picture at night and that is when I get to sew.
 50's Crystal Block Tutorial


For each block you will need
1x 6" square of dark print
2x 5" square of light print (I used a print and solid)
1x 4" square of light print cut on point.
I have described where I used the dark and light print - my sashing will be reasonably dark and that has impacted my placement but switching them would give an effect more like the inspiration quilt.


Construction
Step 1: Making the end units


 Place 5" Squares right sides together and draw a line corner to corner. Sew 1/4" each side of this line.


Cut along the drawn line, press seams to set and then press seam towards the print.


Trim these units to 4" square. Place your ruler with the 45 degree mark on the seam line ensuring the edge of the block extends beyond the 4" mark on your ruler.
Trim the two sides and then turn the block, line up with the 4" line again and the 45 degree line and trim the final two sides.


You will now have the 3 centre squares that are sewn into the block on point.


Step Two: The setting triangles
The 6" square will be cut into 4 triangles like you are cutting a sandwich.
First cut corner to corner diagonally.
And then cut the resulting triangle in half again. It helps to position the 45 degree line on the side and the ruler on the point to ensure your halves will be equal. I find cutting one and a time makes this more accurate.


 Lay out your setting triangles with the square units you made in the previous step. The blocks will be orientated vertically in the final quilt so please orientate the squares in this way when laying it out. The solid white triangles should be on the outside.


The triangles will extend 1/4" beyond the square on one side. Match the top corner (right angle corner) of the triangle with the corner of the square as shown in the picture above.


Sew a one triangle to each of the end squares and two to the middle square.
You will end up with three units as shown above.

Press to set all seams and then press seam allowances towards the setting triangles.


Step Three: Joining the units.
The last step is joining the three units.

Nest the seams as shown in the picture above and pin on the seamline. Your prints and whites will be right sides together as shown in the picture above as well.
You want the seams to match and that 1/4" tag at each end of the seam as shown below.
Sew both joining seams and...
You're done!

There are a lot of pictures in this post spelling out what might seems to be really basic steps but they do help make a precise block. The blocks actually don't take that long to make either but I think they will look pretty effective on mass!