I make no claims the that following block design or colour choices are my own. I have taken ideas and inspiration from this design on the Moda Bakeshop by Mary from the Tulip Patch and this block by Angela from Cut to Pieces. A colour plan came from the Warm and Cool quilt along hosed by Jeni from In Color Order. I have chosen to revise the block tutorials highlighting the measurement of block components and colour placements for clarity and the ease of use by my bee mates. So here goes!
This month we will each be making one larger than average block that is constructed in four quarters (two warm and two cool in this design).
To construct the whole block you will need
(4) 6" square of white (any will do but please avoid creams, light greys and beige)
(2) 6" warm colour squares (or 4 triangles cut from 2 6" squares)
Cross cut all of the squares into triangles
(2) 6" cool colour squares (or 4 triangles cut from 6" squares)
(4) 2 3/4" x 7 1/4" cool colour rectangles
(4) 2 3/4" x 7 1/4" warm colour rectangles
(4) 2 3/4" x 7 1/4" rectangles of white (any will do but please avoid creams, light greys and beige )
Note: As part of the Quilt Along Jeni had a great primer on Warm and Cool colours, worth a read here. Like her, I am looking for colours that are medium value but on the warm or cool spectrum. Sticking to the medium value should help the blocks to fit cohesively together.
This would be the time to raid your scrap box to get a huge variety of fabric colours and prints. The hardest to include variety in will be the squares (to become the corner triangles) because of the way they are cut but if you have some off cuts from large HST this would be a great use for them.
Constructions
1. Make the centre units
Sew a warm (cool) strip to each side of the white strips. You will end up with four units, two warm and two cool. Press seams towards the coloured strips.
2. Sew on the coloured triangles
- Find the centre of the centre white rectangle and the centre of the long side of the triangle. To do this fold the units in half and finger press the centre, be extra careful when doing the triangle so as not to warp the bias edge.
- Match the crease marks and sew triangle to the centre square. Press the seams towards the coloured triangle on the warm blocks and the centre unit on the cool blocks.
- You will end up with something that looks like this.
- Repeat with the other three units.
3. Sew on the white triangles
- Using the same method find the centres again.
- Match the crease marks and sew on the white triangles. Press seams towards the triangle on the cool blocks and the centre unit on the warm blocks.
- You will have one quarter unit completed!
- Repeat with the other three units.
4. Trim your units
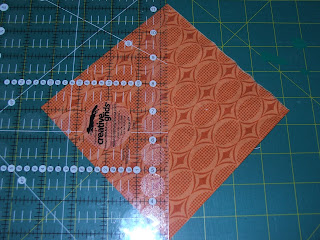
- The units have been deliberately oversized. They will be trimmed to 10" square. I find having a square ruler really helps me do this and this is how I have done it in the pictures but there is not reason is can't be done with a straight ruler.
- Place the ruler over the completed block, matching the mark 1/4" from the edge of the ruler with the spot where your centre unit and triangles meet. This will ensure you are left with a seam allowance that will not cut off your points when you join the units!
5. Sew your units together to make a block!
- Lay your units our with the coloured triangles meeting in the middle and the units forming an 'X' of sorts.
You will want the warm units on the top left and bottom right.
- Pin the units that form the top row together matching the points and sew. Press towards the 'Warm' block.
- Repeat with the bottom row, again pressing towards the warm block.
- Sew the two halves together nesting the centre seam and matching the triangle points.
Your block will be about 19.5" square and finish in the quilt at 19"
Success! Thanks so much 'Cherish' Bees!


