At a recent craft show I took a quick class to learn a few more features on my overlocker and made a take anywhere placemat. I liked the idea of it but not so much some of the finishes so I have made up another with some different finishes.
This is a great project to use up some fabric and batting scraps and would be a great little gift for those that like to take lunches to school, work or anywhere!
Materials
You will need
4x (4"x12") strips of fabric 1 (mine is the Coal solid)
6x (4"x12") strips of fabric 2 (mine is the circuit board print)
5x (4"x12") batting strips
2x 2.5" WOF strips for binding
1x 2.5" WOF strip for tie
Optional - Small cutlery set. I used this one but these are cool too.
Construction
Step One
Cut out the fabric and batting as listed above
Take two of your fabric one strips and three of the fabric two strips. Carefully position these on each of the five batting strips.
Iron these together to help them to 'stick' together.
Step Three
Place one of the Fabric 2 strips on the back of one of the fabric/batting pairs with the right sides out as pictured below.
Place one of the Fabric 1 fabric/batting pairs fabric side down on top and one of the unpaired Fabric 1.
You will end up with (from top to bottom) batting, Fabric 1 (RS down), Fabric 2 (RS up) batting, Fabric 2 (RS down), Fabric 1 (RS up). Check the picture below if that is clear as mud!
Note: You want all the edges to align, mine are staggered to help you see the order.
Step Four
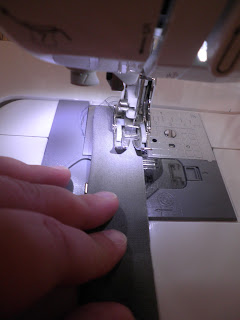
With a 1/4" seam (and I would strongly recommend a walking foot) sew down one long side of the sandwich
Flip both the Fabric 1 sections out so all fabric is right sides out with batting sandwiched in the middle.
Press
Layer the next section on top of the Fabric 1 section that you just pressed.
You will end up with the exact same sandwich with the Fabric 1 and Fabric 2 positions swapped.
Continue sewing the fabric to the previous section as before until you have 5 strips.
Step Five
Trim the top and the bottom of the joined sets to make a squared up rectangle.
Step Six Making the ties
Iron your tie fabric right sides together along the long edge.
Using a 1/4" seam allowance sew across the short end, down the long side where the two raw edges meet and down the other short side pivoting at the corners 1/4" from the edges.
Trim the corner, then cut the strip in half giving two ties
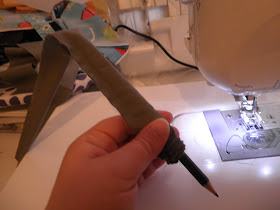
Turn the ties right side out and press. A good way to turn is to poke a pencil into the sewn end and then side the tube down the pencil.
Step Seven
Prep the binding by sewing the two strips together with a bias seam and then pressing wrong sides together down the links as you did for the tie.
Place the two ties in the centre of the long mat sides, with one on the front and one on the back matching the raw edges.
Sew the binding on the front of the mat, mitering at the corners. Fold the binding over the raw edges and secure with machine or hand stitches. I chose to use the machine for strength as I assume this will go in the washing machine fairly regularly.
Viola!
To fold the cutlery set in the placemat place the cutlery set in the centre as pictured.
Fold the left side to the centre
Then repeat with the right side.
Working from the bottom (the side without the tie turn the bottom up and then roll up, enclosing the cutlery set.
Wrap the ties around the bundle and tie in a bow. Pack yourself a picnic and enjoy!


Thanks for the great tut. Will be adding to my to do list. LOL. I try to do one thing a week on my list but I think most weeks I add more than one.
ReplyDelete