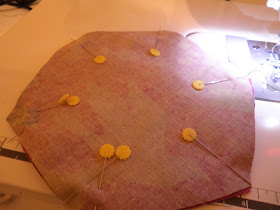
So way back when I made a pouch for the {Pretty Little}Pouch Swap over on Flickr. I knew almost right away what I wanted to make for my partner... but working out how to put that plan into action took a little bit of planning and trial and error.
But I worked it out in the end a recreated if for my partner for a little extra in the Goodie Bag Swap. And I took some step by step pictures the second time around so I thought I'd share a tutorial.
Materials
1 zipper (about an inch shorter than the area of the hexie it will fit in)
Lining fabric
Outer fabric
The size of these last two is going to be dependant on how large you want your pouch to be.
Hexagon template .5" larger than your desired finised pouch size
Step 1. Determine your size and cut your template shapes.
You are going to need to figure out how large you want your pouch to be.When doing this remember that because of the irregular shape your internal area might be a fair bit bigger than that zipper opening. I usually cut my hexie shape about 8" that then finishes at a pouch about 7.5" at the widest point.
Cut your template from template plastic or take your commercial one out of the box.
Step 2: Cut your fabric
From your outer and lining cut one hexagon shape
From your outer and lining fabric cut two rectangles the height of your hexie template + one inch and the width of your template divided by two plus 2"
Two tabs the width of the zipper tape and about 3" long in both the lining and outer fabric.
Step 3: Bind the ends of your zipper.
To prep the zip and make the following two steps a little easier I like to baste the open ends of the zipper tape together. I find this exceptionally helpful at the 'opening' end.
To do this place you zipper under the presser foot and zig-zag with a reasonable wide stitch forwards and backwards a few times. Repeat at the other end. I find pinning hinders rather than helps this process as it can misalign the zipper teeth.
Place the zipper binding tabs right side together with the zipper in the middle. Stitch across the narrow end slowly, sewing over the zip.
Repeat at the other end.
Topstitch.
Step 4: Insert your zipper into the back
Take the zipper and place it right side up on the right side of one of the lining fabric retangles, matching centres, then layer the outer fabric right side down on the front of the zipper. Raw edges should be aligned with the edge of the zipper tape.
Using a zipper foot sew through all layers close to the zipper teeth.
Topstitch through all layers each side of the zip.
Flip the two fabric square over to expose the other side of the zipper and repeat the first two steps.
You now have a panel with a zipper inserted to cut out a hexie shape for the back of the pouch.
Step 5: Cut out the pouch back
Lay the panel you created in the last step on your cutting surface with the zip closed and the zipper pull facing up.
Lay your hexie template on the top, positioning the zipper where you would like it in the finished pouch. Mine is about a third of the way down.
Draw around the template, you will need to do one side and then the other to make it as accurate as possible as the template will not lie flat because of the zipper pull.
Cut out on your drawn line, through both the outer and lining fabric.
You will end up with a hexie shape with a zipper inserted the same size and shape as the single outer and lining fabrics.
Step 6: Sew the pouch together
Make sure your zipper is open.
Layer your three pieces (outer, back panel and lining) in the following order - Outer panel, back panel with outer fabric down, lining fabric, right side down.
Mark a spot about .5" in from both corner on one of the bottom sides.
Sew through all layers around the edge, starting at one dot and finished at the other, locking stitches at the beginning and the end. Go slowly over the area with the zippers to make sure your needle doesn't catch and break.
Fold the two open lining sections back and sew the last part of the outer section closed with the .25" seam.
Trim corner bulk.
Step 6: Finishing off
Turn the pouch right side out through the zipper opening and the hole in the lining. It will be a tight squeeze so go carefully to make sure you don't damage any of your seams.
Take something with a dull point (letter openers or knitting needs are good) and poke the point out.
Hand sew the lining in the opening closed.
Congratulations, you're done!


No comments:
Post a Comment